Creating Classifications with Togal.AI
Togal
|
With AI estimating software, Togal.AI, creating classifications for a project is seamless. Read further to learn how.
Table of Contents
- Classifying different items
- The “quantities” panel
- Applying the same classification to other areas
- Applying classifications to multiple areas
Classifying Different Items in Togal.AI
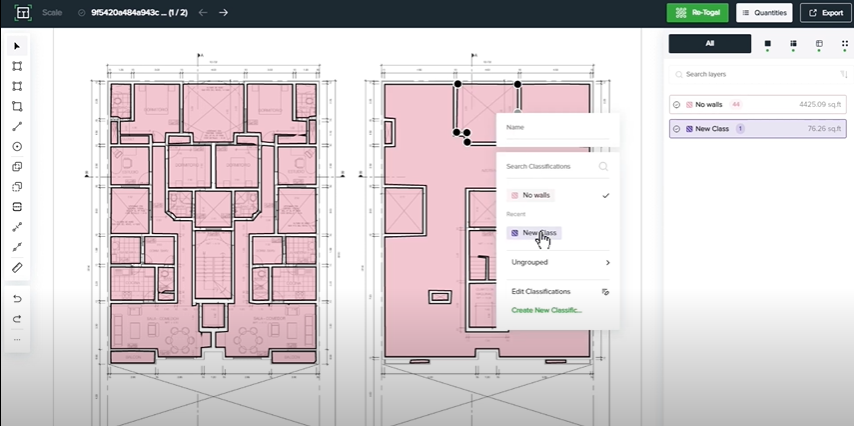
Within a drawing, select the area line or object to classify. Right-click on it and select “create new classification”.
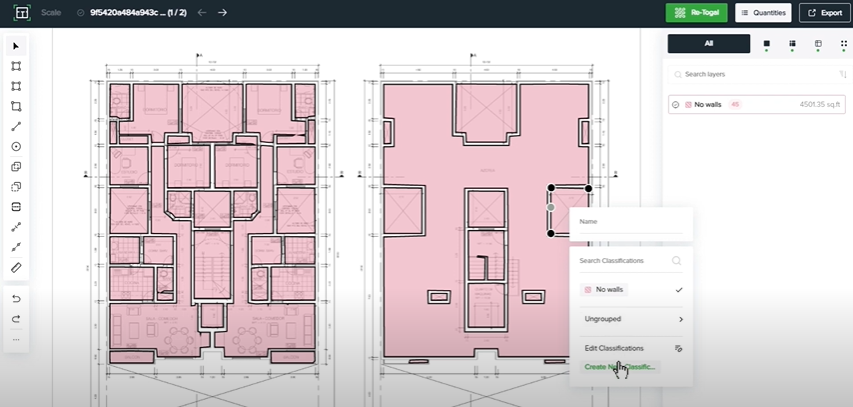
Togal.AI provides the ability to:
- Name the classification
- Assign a color
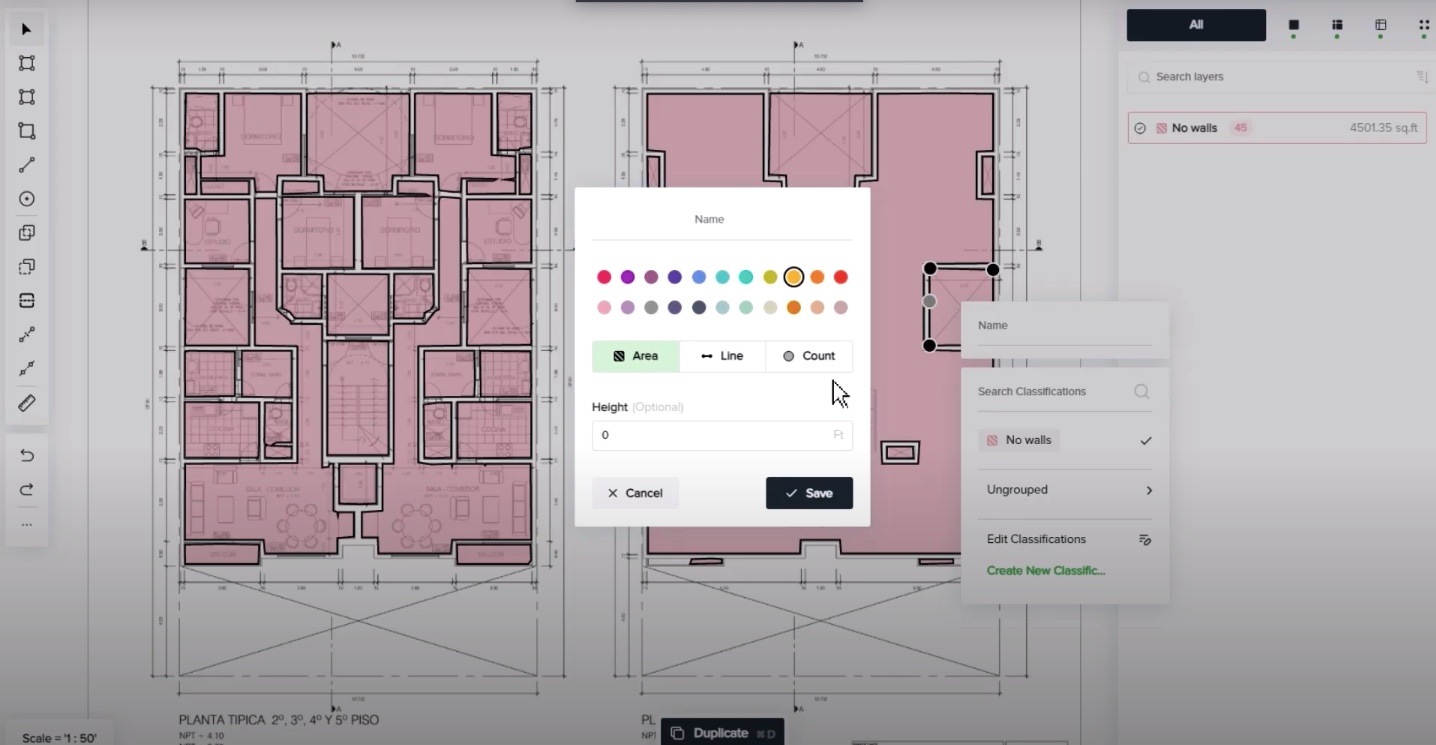
- Choose the takeoff type - “area,” “line,” or “count”
The example below shows the “area” selected. Click “Save” and the classification will be implemented.
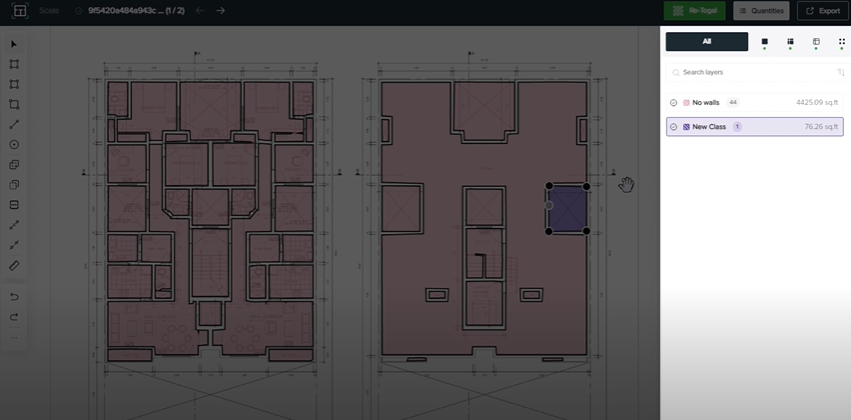
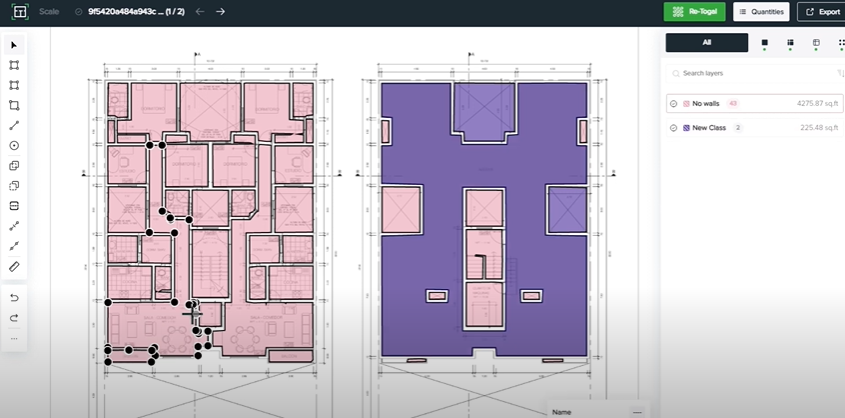
“Quantities” Panel
On the right side, a panel displays showing each classification and the number of items within each classification. Also shown are the total measurement size of these class items.
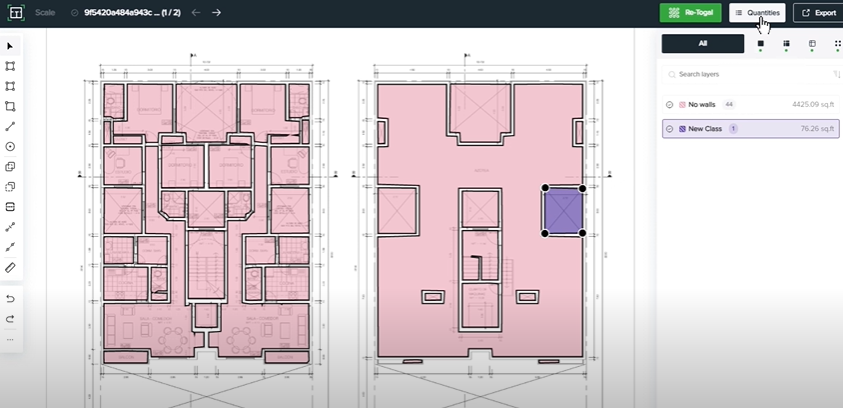
Close the panel by clicking on the “Quantities” button at the top-right of the interface. Example shown below.
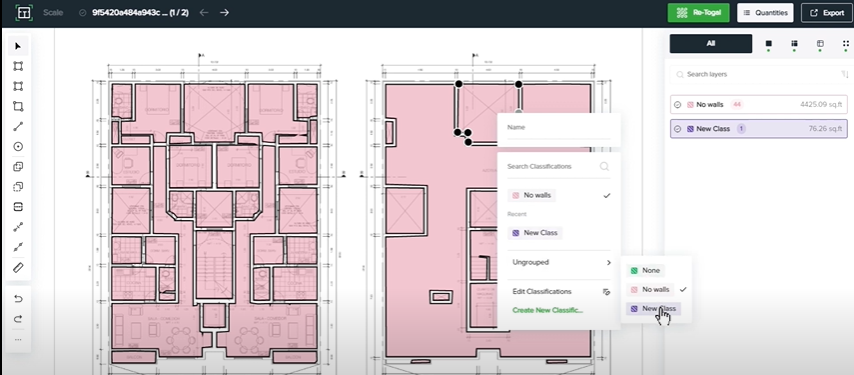
Applying the Same Classification to Other Areas
To apply the same classification to other areas, just right click on them. You can either pick it up from the recent ones or go to the ungrouped section and you will find it here.
Applying Classifications to Multiple Areas
Apply classifications to multiple areas at the same time by holding “shift” and drawing a window with the items to include.
Next, right-click and choose the classification.
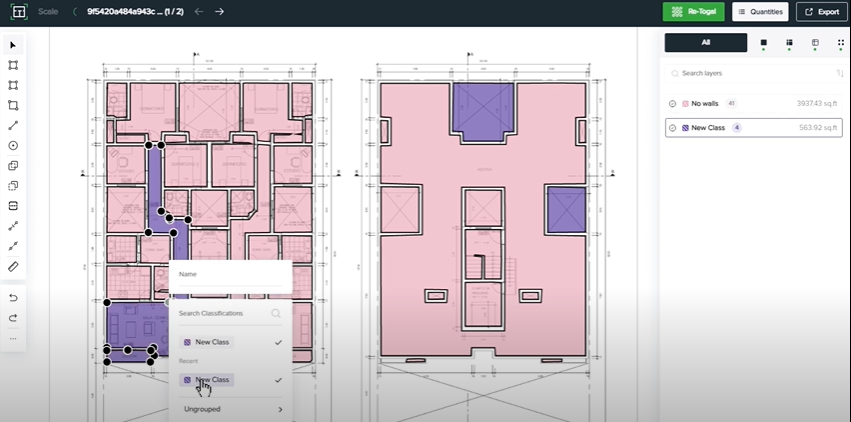
To apply the same classification to the areas located on the different parts of the project, hold “shift” and left-click the areas.

This tutorial showed how to add classifications with Togal.AI. To learn more about how Togal.AI can integrate with your workflow, request a demo.
Learn How to Use Other Togal.AI Features with These Tutorials
- Create New Projects and Upload Drawings to Togal.AI
- Automatically Name Drawings in Togal.AI
- How To Compare Drawings in Togal.AI
- How to Classify Walls In Togal.AI
- How To Import Drawings From Procore
- Exporting Quantities and Takeoffs From Togal.AI
- Improve the Precon Workflow Using the Editing Tools in Togal.AI
- Auto-Classify Areas Using the Automatic Classification Feature Within Togal.AI
- Set Project Quantities Using the Quantities Panel in Togal.AI
- How To Create Classification Groups With Togal.AI
- Set the Project Scale in Togal.AI
- With Togal, Classify Different Items of Your Project
- How to Create Areas, Lines, and Counts
Book a demo of Togal today.